
Calibrate Your Hygrometer: The 75% Salt Test Guide
A saturated table-salt slurry sealed in an airtight container produces approximately 75% relative humidity at normal room temperatures. That single fact is the foundation of every home hygrometer check. Run the test, compare your reading to 75%, and the difference is your offset. Apply it, label it, or adjust it — and your hygrometer is as accurate as it can be without a laboratory.
Quick-start checklist:
- Mix plain table salt with a few drops of water to a damp-sand consistency
- Place the salt and your hygrometer inside a sealable bag or airtight container
- Keep the sensor away from direct salt contact
- Seal the container and leave it undisturbed for 6–12 hours
- Read the display through the sealed container
- Calculate offset: your reading minus 75%
- Adjust the device if it supports it, or note the offset on a label
Statistic: Home humidity sensors commonly show some variation from unit to unit, making testing important before trusting any reading, which is exactly why testing before trusting any reading matters.
Table of Contents
- How to calibrate a hygrometer with the salt test
- Analog vs. digital hygrometers: applying your offset
- What to do when the reading won’t stabilize
- How often should you verify your hygrometer?
- Other ways to check hygrometer accuracy
- Why the salt test works, and where it falls short
- Your 10-minute prep checklist for tonight
- Key Takeaways
- The salt test is worth the overnight wait
- Protect your cigars with the right humidor from Thorscigarvault
- Useful sources and further reading
How to calibrate a hygrometer with the salt test
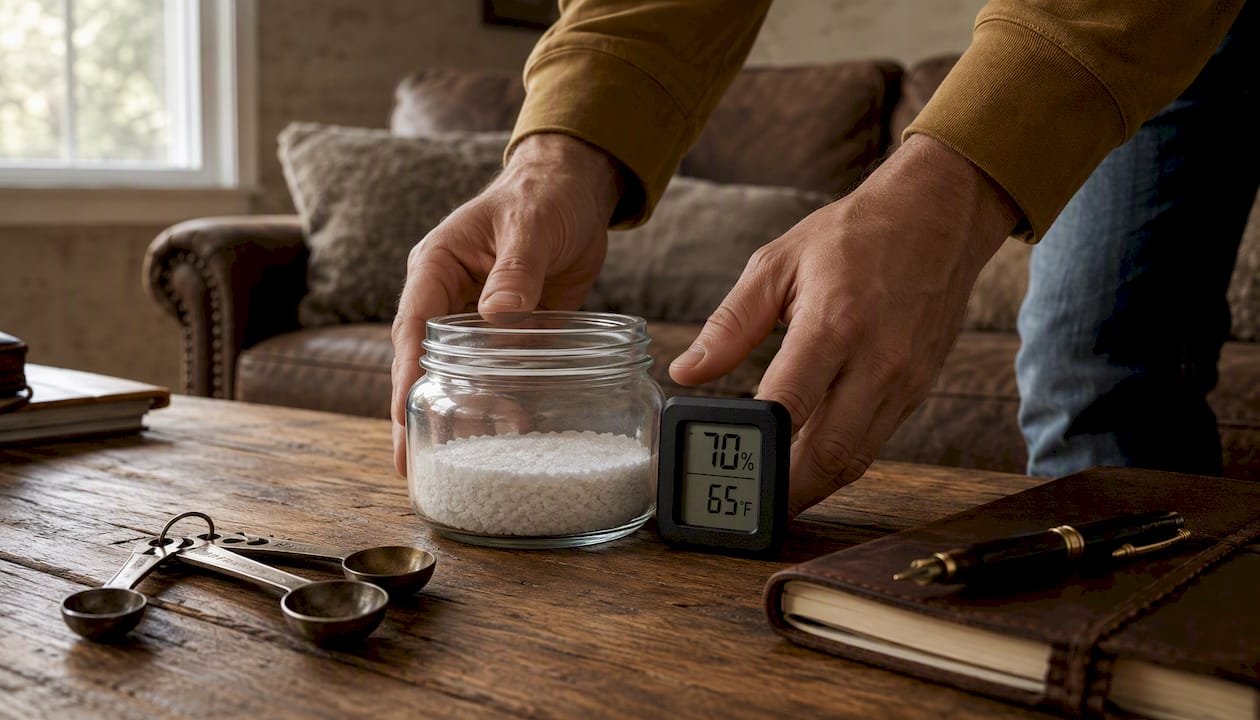
The materials are already in your kitchen. You need plain table salt (not iodized if you can avoid it, though iodized works), a small bottle cap or shallow dish, a resealable plastic bag or airtight container large enough to hold both the cap and your hygrometer, and a few drops of water.
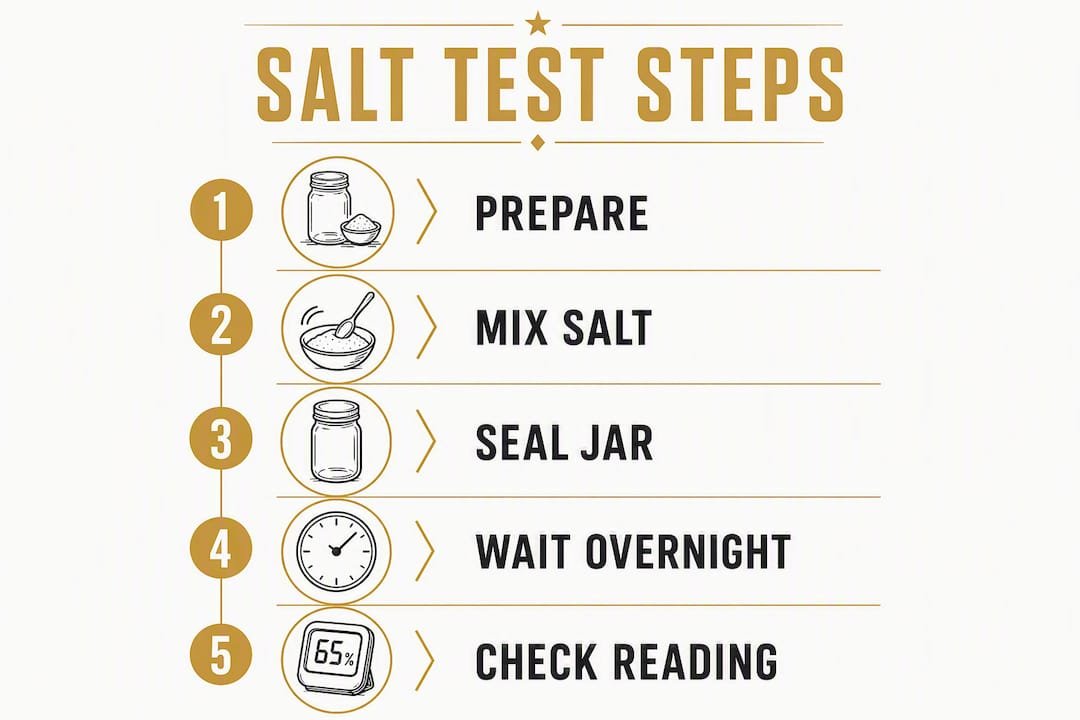
- Mix the salt paste. Add salt to the cap and drip in water, a few drops at a time, until the salt clumps like wet sand. It should hold its shape when pressed, not pool or dissolve. Too much water breaks the equilibrium and produces an incorrect humidity level.
- Place both inside the container. Set the salt cap and your hygrometer in the bag or container side by side. The sensor face should point toward the salt but never touch it.
- Seal it. Close the bag or container firmly. Leave some air inside — squeezing out all the air disrupts the salt equilibrium and skews the result.
- Choose a stable location. Set the sealed container on a flat surface in a room held between 68°F and 72°F. Keep it away from vents, windows, and direct sunlight. Temperature gradients inside the container will prolong stabilization and can throw off the reading.
- Wait 8–12 hours. Overnight works perfectly. Do not open the container during this period.
- Read through the seal. Look at the display without opening the bag. Record the number.
- Calculate your offset. Subtract 75 from your reading. If your hygrometer shows 78%, your offset is +3% — meaning it reads 3% high. If it shows 71%, your offset is -4%.
Pro Tip: The salt consistency is the most common failure point. If your salt looks like a puddle, start over with fresh salt and far less water. Wet sand — not soup.
Analog vs. digital hygrometers: applying your offset
What you do with the offset depends entirely on what type of hygrometer you own.
Analog hygrometers (the kind with a needle and dial) typically have a small adjustment screw on the back or a rotating bezel on the face. After completing the salt test:
- Use a small flathead screwdriver to turn the adjustment screw until the needle reads 75% while the device is still sealed inside the container
- If your unit uses a bezel, rotate it to align the needle with 75%
- Reseal immediately if you opened the container to adjust, then wait another 30–60 minutes and confirm the reading holds
Digital hygrometers split into two camps. Many mid-range and higher-end units include a dedicated calibration or offset mode — check the manual for a button combination (often holding “Mode” for 3–5 seconds). You enter the offset value directly, and the device applies it automatically going forward. Others, particularly inexpensive models, offer no adjustment at all.
- For non-adjustable digital units, record the offset and apply it manually — a sticky note on the back of the device works fine
- If you use a smart-home dashboard or app, enter the offset there so automations trigger at the corrected threshold
- Never force internal adjustments on a sealed digital unit beyond what the manufacturer describes
Battery-powered units should have fresh batteries before the test — a low battery can cause erratic readings that mimic a calibration problem. Hardwired sensors with cords can be tricky to seal inside a bag; use a large container with a lid and route the cord under the lid edge, then seal around it with tape.
After any adjustment, run the salt test again. One confirmation pass is all it takes.
What to do when the reading won’t stabilize
A few problems come up repeatedly, and most have simple fixes.
Reading keeps drifting:
- Check for bag leaks — press the seal firmly and look for gaps
- Confirm the room temperature is stable; even a nearby HVAC cycle can cause swings
- Allow up to 24 hours for slow capacitive sensors to fully equilibrate
- Make sure the sensor face is not touching the salt cap
Reading is wildly off (more than ±5%):
- Repeat the test with fresh salt and a new bag before concluding the device is faulty
- Check for salt crystals or residue on the sensor — contamination and polymer aging in capacitive sensors cause persistent offsets that no amount of re-testing will fix
- If the error repeats on a second clean test, the sensor likely needs professional service or replacement
Common mistakes to avoid:
- Dissolved salt (too much water added)
- Removing all air from the bag before sealing
- Placing the setup near a heating vent, window, or exterior wall
- Touching the sensor with bare fingers — skin oils can contaminate the sensing element
- Opening the container before the full stabilization period ends
A small agreement within a few percent is generally acceptable for most home applications. A sustained error beyond a few percent is the threshold where replacement or professional calibration becomes necessary.
How often should you verify your hygrometer?
For typical home environments, verifying once a year is usually sufficient. Spaces requiring tighter humidity control need more frequent checks, such as several times per year for humidors, wine cellars, grow tents, basements, and crawl spaces
- After any of these events: firmware update on a smart sensor, battery replacement, exposure to extreme cold or heat, or a drop or impact
Maintenance habits that extend accuracy:
- Keep the sensor face clean and free of dust
- Replace batteries before they drop below half charge
- Store the hygrometer away from condensation sources when not in use
- Write the test date and offset directly on a small label stuck to the back of the device
Pro Tip: For non-adjustable units, make a small offset sticker — something like “+3%” in permanent marker on a piece of tape. Stick it to the back. Six months from now, you’ll thank yourself.
Other ways to check hygrometer accuracy
The salt test is the most reliable home method, but it is not the only option.
| Method | Time Required | Accuracy | Best For |
|---|---|---|---|
| Towel method | 30–45 minutes | Qualitative only | Quick responsiveness check |
| Salt test (NaCl, ~75% RH) | 6–12 hours | Single-point reference | Hobbyist calibration offset |
| Factory humidity packs | 24 hours | Single-point, reliable | Convenient hobbyist use |
| Multi-salt chamber | 8–12 hours | Multi-point reference | Advanced hobbyists, technicians |
| Lab calibration (ASTM E104) | Varies | Traceable, multi-point | Regulatory, precision, research |
The towel method wraps a damp cloth around the sensor for 30–45 minutes. It tells you whether the sensor responds to high humidity at all, but it gives you no reference number to calibrate against. Use it as a quick sanity check, not a calibration step.
Factory humidity packs (Boveda calibration kits, for example) are pre-mixed sealed pouches that produce a known RH. They are convenient and reliable for a single reference point, though they need a full 24 hours to stabilize — the same patience requirement as the salt test, with less mess.
Multi-salt chambers use different saturated salts to hit multiple reference points in one session. That approach is more complex and better suited to technicians who need to map a sensor’s accuracy across its full range.
Why the salt test works, and where it falls short
Saturated sodium chloride (NaCl) in contact with liquid water reaches a thermodynamic equilibrium with the air above it at approximately 75% RH under normal room temperatures. The salt absorbs or releases moisture until the vapor pressure above the solution stabilizes. Because this equilibrium is a physical property of the salt-water system, it produces a reproducible reference point without any special equipment.
The limit is that it is a single-point verification, not a full calibration. A hygrometer could read correctly at 75% and drift at 40% or 90%. That is why professional calibration per ASTM E104 tests at multiple humidity points, documents hysteresis, and uses NIST-traceable chilled-mirror hygrometers or two-pressure humidity generators to achieve low measurement uncertainty.
For practical hobbyist needs — cigar humidors, home HVAC checks, basement monitoring — a single-point salt verification plus periodic rechecks is typically sufficient. Pursue lab calibration when you need traceable accuracy, regulatory documentation, or uncertainty below a few tenths of a percent.
Common saturated-salt reference points:
| Salt | Approximate RH at 68°F |
|---|---|
| Sodium chloride (NaCl) | ~75% |
Your 10-minute prep checklist for tonight
You can have the test running before you go to bed. Here is exactly what to gather and do.
- Gather materials (2 minutes): plain table salt, a small bottle cap or shallow dish, a resealable gallon bag or airtight container, a few drops of water, your hygrometer, and a small flathead screwdriver if your unit is analog.
- Mix the salt paste (3 minutes): add salt to the cap, drip in water slowly, and stop when the mixture holds a clumped shape like wet sand.
- Place and seal (2 minutes): set the cap and hygrometer in the container, keep the sensor clear of the salt, leave air inside, and seal firmly.
- Position it (1 minute): place on a flat surface in a stable-temperature room, away from vents and windows.
- Wait overnight (8–12 hours): do not open it.
- Read and record (2 minutes): note the display through the sealed container, subtract 75, and write down your offset.
Key Takeaways
The salt test is the most practical single step you can take to verify hygrometer accuracy at home — and the offset it reveals tells you exactly how much to trust every reading going forward.
| Point | Details |
|---|---|
| Salt test target | A sealed NaCl slurry produces ~75% RH; your hygrometer should read 75% after 8–12 hours. |
| Offset calculation | Subtract 75 from your reading; apply the result as a device offset or a manual label. |
| Error threshold | A reading within ±3% is acceptable; a sustained error above ±5% warrants replacement or lab calibration. |
| Recheck intervals | Verify every 3–6 months for humidors and high-humidity spaces; once a year for typical home use. |
| Thorscigarvault humidors | Pairing a verified hygrometer with a quality humidor from Thorscigarvault protects your cigars at the correct humidity. |
The salt test is worth the overnight wait
Most people skip hygrometer verification entirely, then wonder why their humidor feels off or their basement readings seem inconsistent. The salt test asks for one evening of patience and about five minutes of actual work. That ratio is hard to argue with.
Where I’d push back on the conventional advice is the idea that “any hygrometer is fine once calibrated.” A cheap sensor with a ±5% native error and a capacitive element that drifts seasonally will need rechecking every few months no matter how carefully you run the salt test. For a cigar humidor — where the difference between 65% and 72% RH is the difference between a perfect draw and a cracked wrapper — the sensor quality matters as much as the calibration method. A verified reading from a mediocre sensor is still a mediocre reading.
The other thing most guides understate: temperature stability during the test is not a minor footnote. A room that swings 5°F overnight because the heat kicks on and off will produce a reading you cannot fully trust. A quiet interior room, away from exterior walls and vents, is worth the extra thirty seconds to find.
For hobbyist use — humidors, home monitoring, grow tents — the salt test is genuinely sufficient. The moment you need a documented, traceable result (regulatory compliance, laboratory work, precision instrumentation), skip the bag and go straight to an ISO/IEC 17025-accredited calibration lab.
Protect your cigars with the right humidor from Thor’s Cigar Vault
A verified hygrometer is only half the equation. The other half is a humidor that actually holds humidity where you set it.

Thor’s Cigar Vault carries a curated selection of luxury humidors built to maintain stable conditions for premium cigars — including the Raching RR880 Havana Tan, a cabinet-style unit designed for serious collectors who want consistent, measurable humidity control. Once your hygrometer is verified and your offset is noted, pairing it with a well-sealed humidor means the number you read is the number your cigars are actually experiencing. Browse the full humidor and accessories shop to find the right fit, and take 10% off your first order when you subscribe to updates. The team is available to help match you with the right storage solution for your collection size and budget.
Useful sources and further reading
For readers who need deeper technical detail or traceable calibration resources:
- NIST (National Institute of Standards and Technology) — the primary U.S. authority on measurement standards, including humidity; use their resources to find NIST-traceable calibration labs and reference documents.
- CalibrationOS: Hygrometer Calibration Procedure (ASTM E104) — detailed overview of ASTM E104 and ISO/IEC 17025 lab procedures, multi-point calibration, and uncertainty documentation.
- Protimeter: Calibrate a Hygrometer vs. Verify Accuracy — practical field-technician perspective on verification thresholds and when to escalate.
- The-Weather.com: Salt Test (75% Rule) — step-by-step salt test procedure with notes on stabilization time and common errors.
- Arcanasolis: How to Calibrate Your Thermohygrometer — focused guidance on temperature stability during the test and placement best practices.
When traceable accuracy or low measurement uncertainty is required, contact an ISO/IEC 17025-accredited humidity calibration laboratory rather than relying on any home verification method.





11 Comments